Origami Glider
This was an attempt to make a paper airplane that resembled a hang glider. It works okay, but it's not the greatest. But it's still worth the two minutes it takes to fold it.
If you want to try folding a paper airplane out of a Post-It Note, click on the link below. I like the Post-It note glider a lot better than this one.
Post-It Note Glider
|
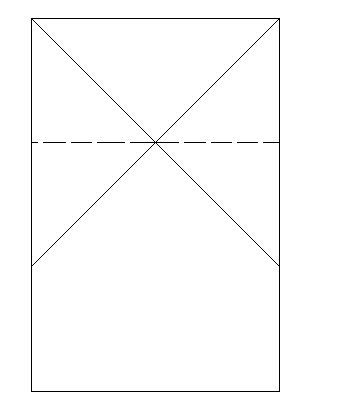
Step 1: First, start off with a rectangular piece of paper. The exact dimensions and ratios aren't important. |
|
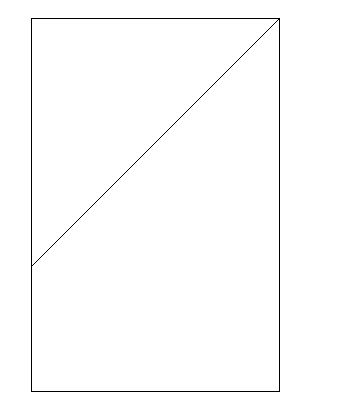
Step 2: Next, you will need to make a 45 degree fold from one of the corners, like in the picture to the left. |
|
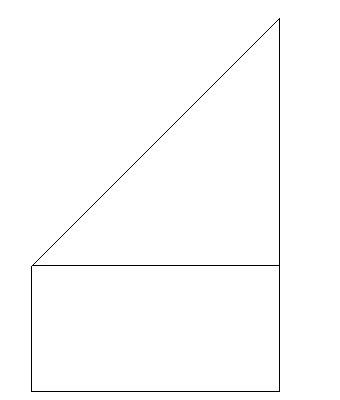
Step 3:After making the fold, the paper will look like this. |
|
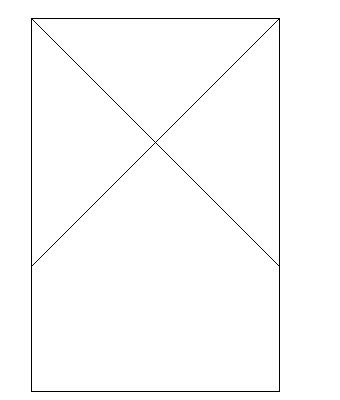
Step 4: Unfold your paper and repeat steps 2 and 3 folding from the other corner. Unfold the paper and it should look like this. |
|
Step 5: Now fold the paper on the line shown in the opposite direction of the previous folds, then unfold, so that the paper will look like this. |

|
Step 6: Fold the top of the paper down, going in the opposite direction of the fold made in Step 5. Tuck the sides in, so that you're left with something that looks like this. If you've ever folded origami, you should be familiar with this type of fold. It's known as a water bomb. It is the same type of fold used to start off an origami ball. The only difference is that since this is a rectangular sheet of paper, instead of square, the folding is only done on one end of the paper. |

|
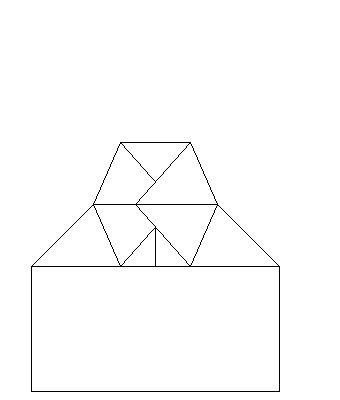
Step 7: Make a mark where the red line is shown here, in the center of that edge. Next fold the top layer of paper up along the black line shown. Make your fold right by lining up the mark you just made with the point of the triangle. Don't worry, the paper won't all sit flat. |
|
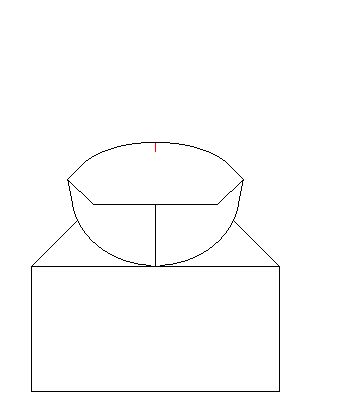
Step 8: After step 7, you should have something that looks like this. (Note: The red mark is actually on the opposite side of the paper. It is just shown to indicate where it should be.) The sides will be sticking up into the air. Now, you need to fold those sides flat. Do this by bringing the point of each flap down and lining it up with the crease you just made. When the point is there, just push the flaps flat, and make creases in them. Look at the next picture to get an idea of what your folds should look like. |
|
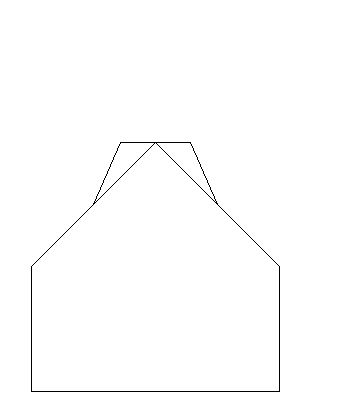
Step 9: Your paper should now like this. You're done, and ready to fly the glider. |
|
Here is a picture of the glider from the other side. To fly the it, just hold it by the back of the wing, with the nose pointing down just a little bit, and let it go. You can also push it a little bit, but it doesn't always fly really well this way. You can also experiment with it by folding rudders into the wings, giving the wings a dihedral, etc. |